Setting Up Local Envirornment for COMP 2211
In COMP 2211, you are advised to use Google Colab for coding. However, if you have a GPU on your own device, you may want to run your code locally. Then you may check this page for reference. (This is completely optional)
References & Useful Links:
Part 1a. Setting Up Environment (For Windows + Nvidia GPU Users)
Prerequisite: Part 1a assumes that you are using a Windows machine with a Nvidia GPU available. If you are not using Windows, check Part 1b instead. If you are using Windows and a non-Nvidia GPU, this guide my not be helpful for you. You may need to check tutorials for your GPU specifically, or simply use Colab.
Step 1. Download and Install Anaconda
First, download the Anaconda installer using this link. You may be asked to provide your email address.
Second, launch the downloaded installer, follow the instructions to install Anaconda.
After finishing the installation, enter the Start Menu, navigate to "All Programs", and you should be able to find "Anaconda Prompt" under the "Anaconda" folder (the names may have tiny difference among different systems).
Step 2. Create a Conda Environment and Install Libraries
Step 2.1 Create Environment
Open the Anaconda Prompt. You should see a window like this:

Here, base means you are in the default environment. Now we will create a new environment for tensorflow.
In the prompt window, type this command and press Enter:
conda create --name tf python=3.9
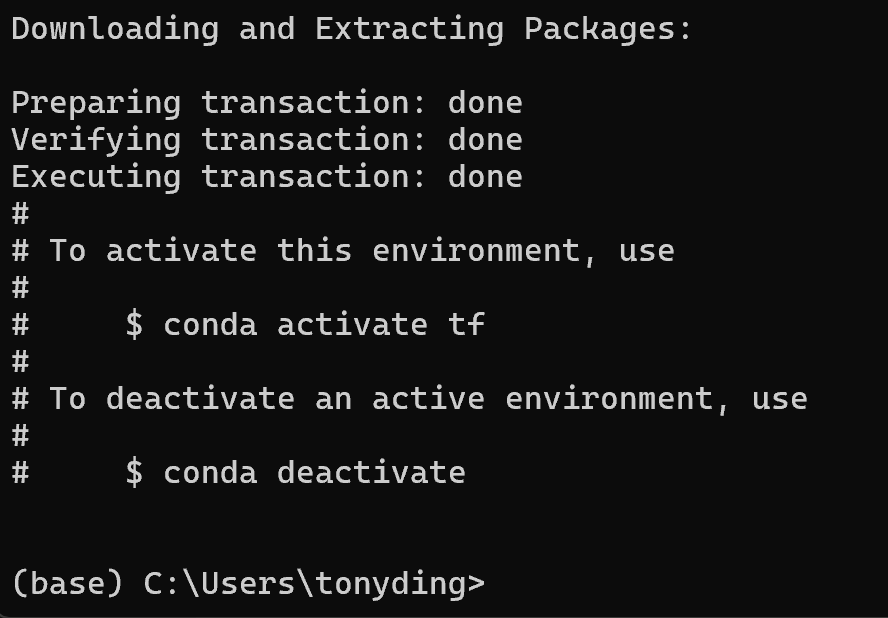
This will create a environment called tf and install python version 3.9 in it. You may be asked for input in the process. Input y and press Enter. Wait for a while, and you will see something like this if the installation is successful:
Step 2.2 Install Libraries
Now you have a environment which is called tf and has python 3.9 in it. Next, we will activate the environment and install necessary libraries in it.
In the Anaconda Prompt, type this command:
conda activate tf
You will see that base now changes to tf, meaning that you have switched to the environment tf:

Make sure you are in tf (in all the following steps), then input this command (Also input y if asked):
conda install -c conda-forge cudatoolkit=11.2 cudnn=8.1.0
The line above installs some necessary things to make your GPUs accessible by your python programs. It may take some time. After that, you should see a success message. Then, run these two commands in order:
python -m pip install --upgrade pip
pip install "numpy<2" "tensorflow<2.11" ipykernel scikit-learn opencv-python matplotlib
It would also take some time. After the installation is finished, type this command to check whether tensorflow has "seen" your GPU:
python -c "import tensorflow as tf; print(tf.config.list_physical_devices('GPU'))"
Wait for a while. If all things work well, you should see something like this:

Possible Problems
- Using GPU to run your code requires appropriate NVIDIA GPU Driver. Most likely, the one that is installed on your device would be enough. However, if you encounter any problems, you can try to update your GPU driver.
- The TensorFlow version we installed in this tutorial is
2.10. The version on Colab is2.18. If you see any weird error messages when running your code, it might be because of the version difference.
Part 1b. Setting Up Environment (For non-Windows Users)
If you have completed Part 1a, you can jump to Part 2 directly.
Installing TensorFlow
TensorFlow is one of the libraries we will use in COMP 2211. It has some requirements on Python versions, so I recommend installing it first.
If you know how to use Docker, then using TensorFlow can be very easy. Please refer to this link to check how to run TensorFlow with Docker.
If you do not know Docker, then install Python first, and then refer to this link to install TensorFlow.
Remember: the version of Python is very important for TensorFlow.
I am not able to provide a detailed guide here because I only have a Windows machine.
Installing Other Libraries
Here are the commands to install other libraries you would probably need in COMP 2211:
pip install --upgrade pip
pip install ipykernel scikit-learn opencv-python matplotlib
Part 2. VSCode Configurations
I recommend using VSCode to write your code. If you do not have VSCode installed, go to this link to download and install it.
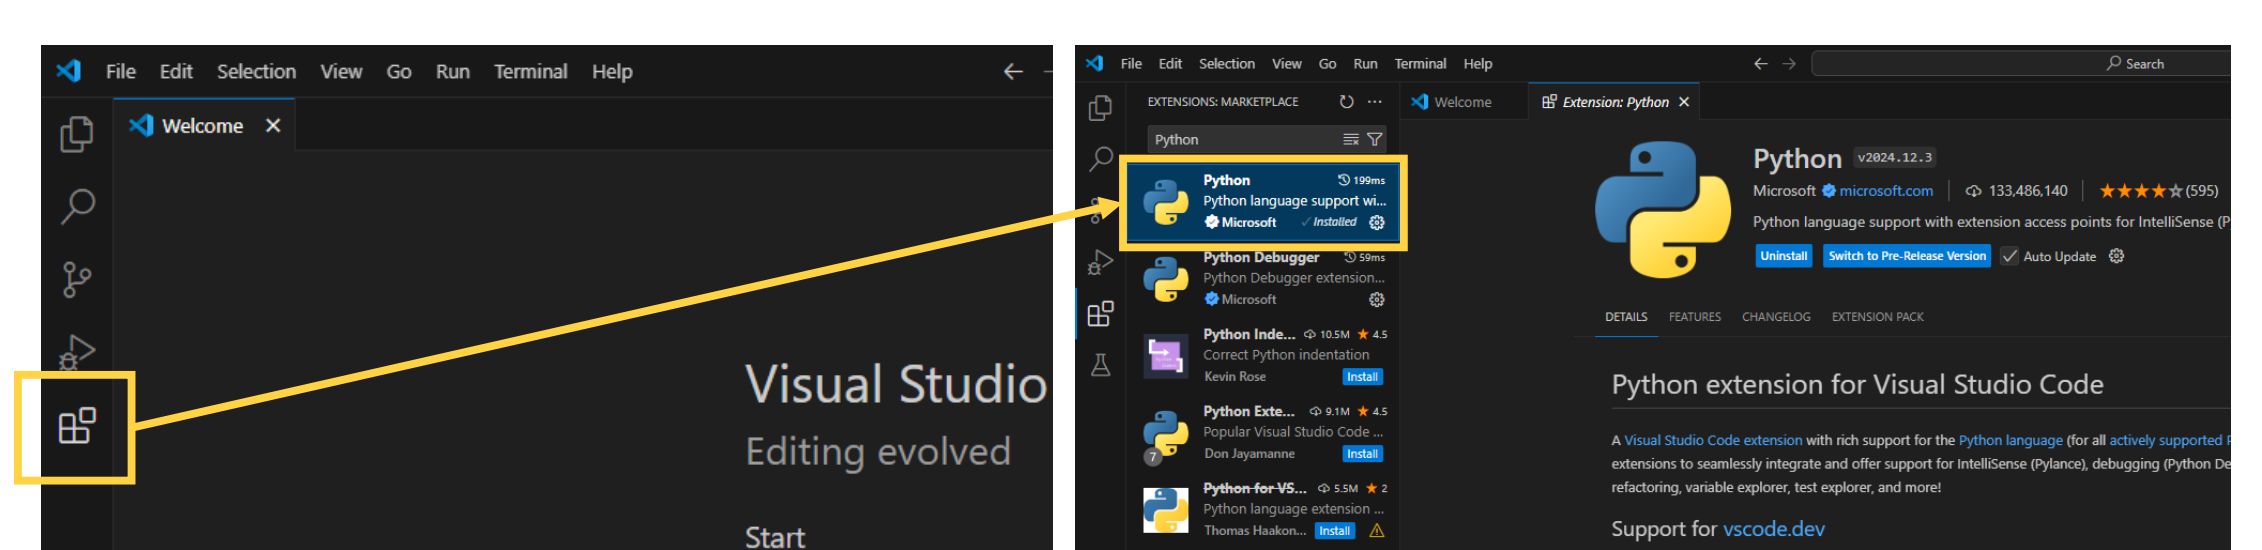
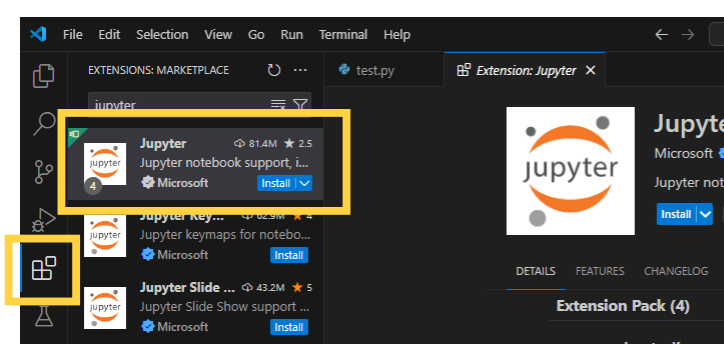
Open VSCode, go to Extensions, install Python and Jupyter extensions (Check images below).
Now, open a .ipynb file, this file for example, and you will see "Select Kernel" at the top right corner:
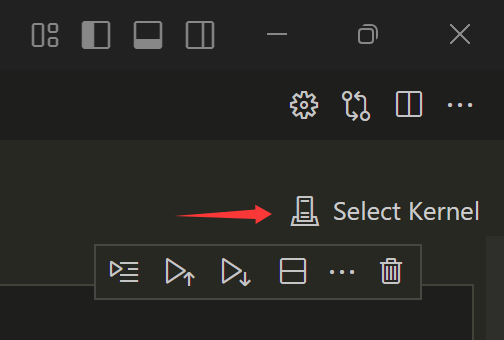
Click "Select Kernel", choose "Python Environments..". Then choose your Python environment which has the libraries above installed. If you followed the instructions in Part 1a, then the environment name should be tf. This operation tells VSCode which environment should be used to run the python code in this .ipynb file.
Now you can run the code just like in Google Colab.
Extra Notes
Difference Between Local Environments and Colab
On your local machine, you may find some code cells in the notebooks lead to errors, especially those lines that start with ! or import a library that is only available on Colab. Those lines are usually for downloading or moving files. To solve the problems, you can try to do the jobs by yourself instead of running those lines.
About pip
pip is a tool to manage python packages. If you want to install more packages, such as tqdm, you can simply run pip install tqdm.
Note that if you want to install a package in a conda environment, you need to open Anaconda Prompt and activate the environment by conda activate tf first (here tf is the name of the environment).
More Problems?
If you have further questions, consider the following methods:
- Post a question on Piazza
- Ask instructors/TAs for help (by email / office hours / at labs, etc.)
- Try to Google it
- Ask a Large Language Model
- Check the official documentaion of TensorFlow or others
You can also find me (the "barcode scanner") at LA3, and I will be very happy to help :D